You can track your time in Whid, then synchronize your trackings with ClickUp. This way you can get the best of both worlds.
- Connect to ClickUp Create a new profile in Whid with your ClickUp credentials.
- Set up sync mappings Automatically map the tasks you create in Whid to ClickUp tasks.
- Benefit from sync mappings Include ClickUp IDs in your task names for easy handling.
- Sync to ClickUp Synchronize your tracked times from Whid to ClickUp.
Connect to ClickUp
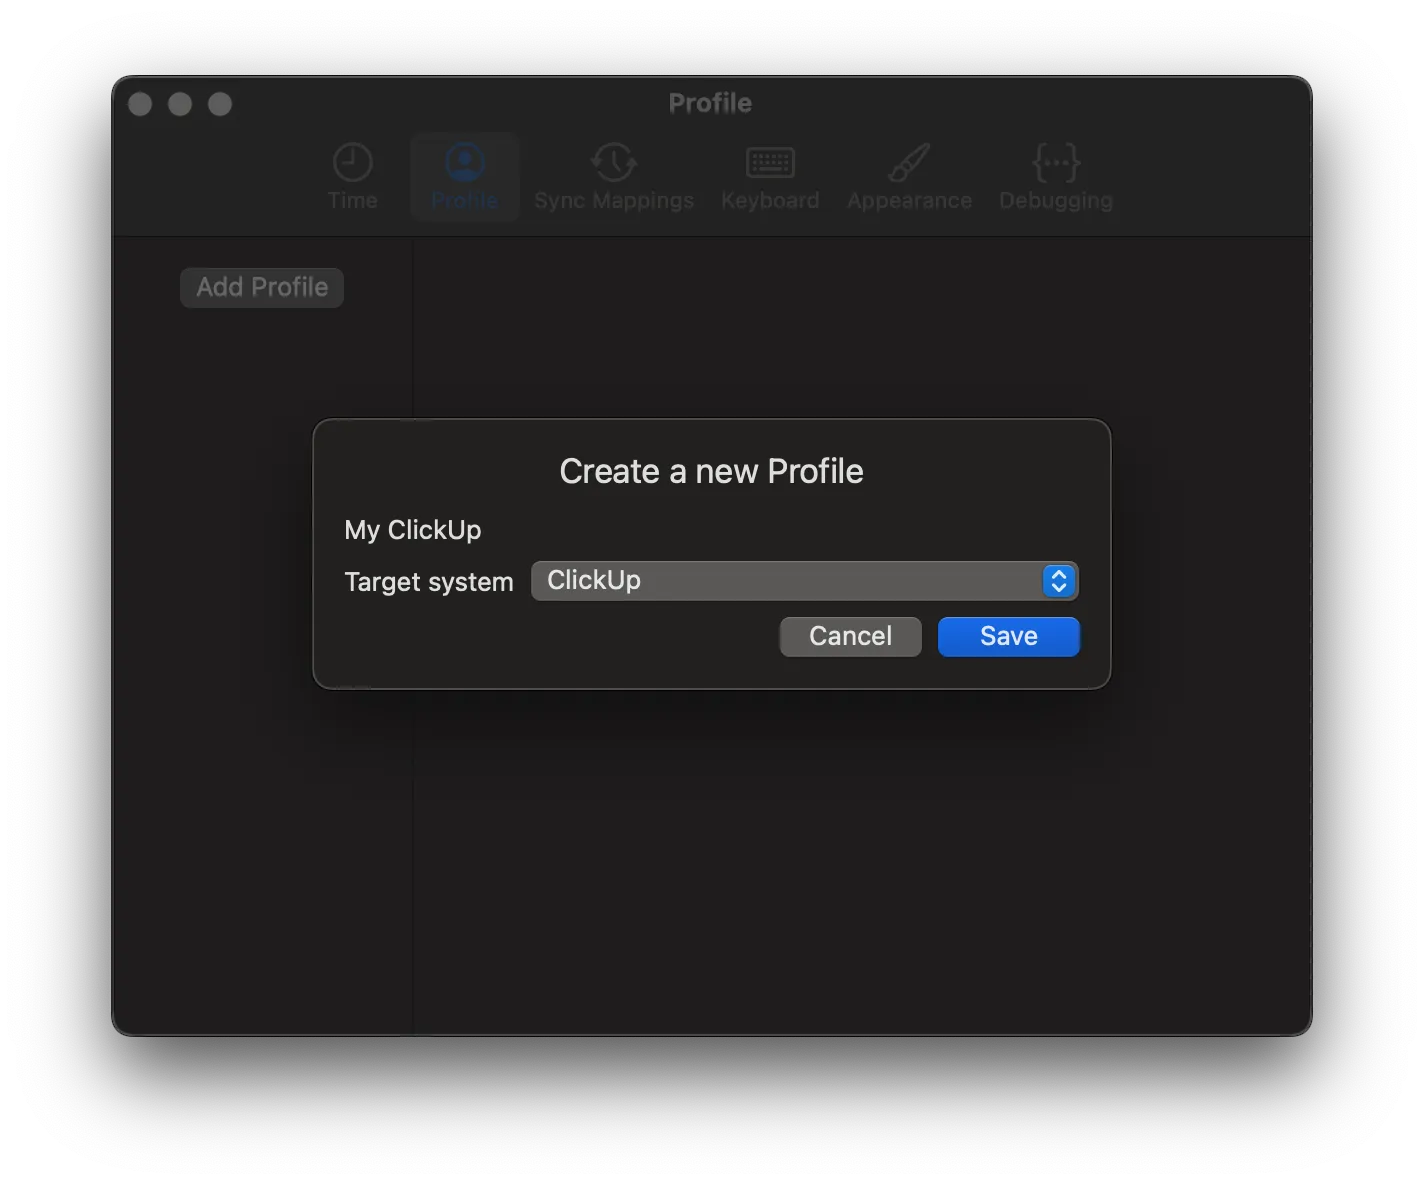
To add your ClickUp profile, first you have to open the Settings > Profile tab in Whid. Then click on the “Add Profile” button, set a name for your profile (e.g. “ClickUp” or “My ClickUp”) and select “ClickUp” from the target system selector.
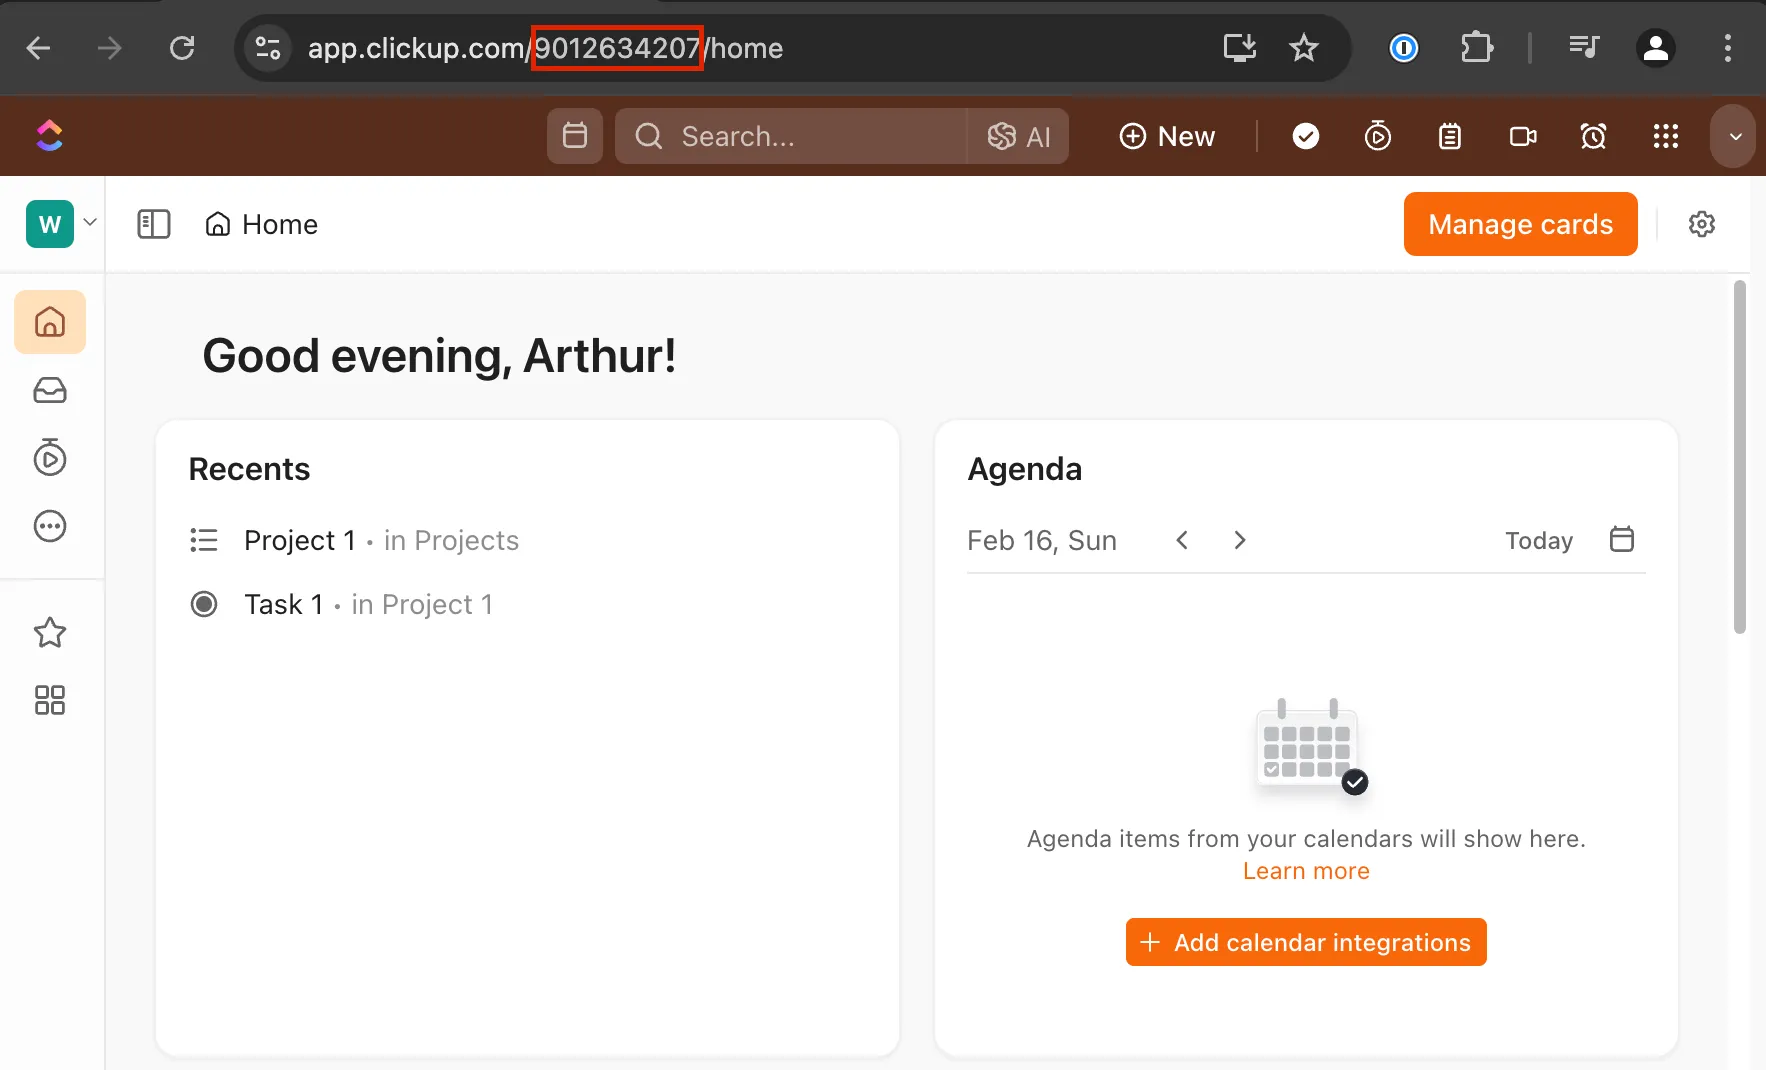
To fill the Team ID field, you can open the Home page in ClickUp, and copy it from the URL.
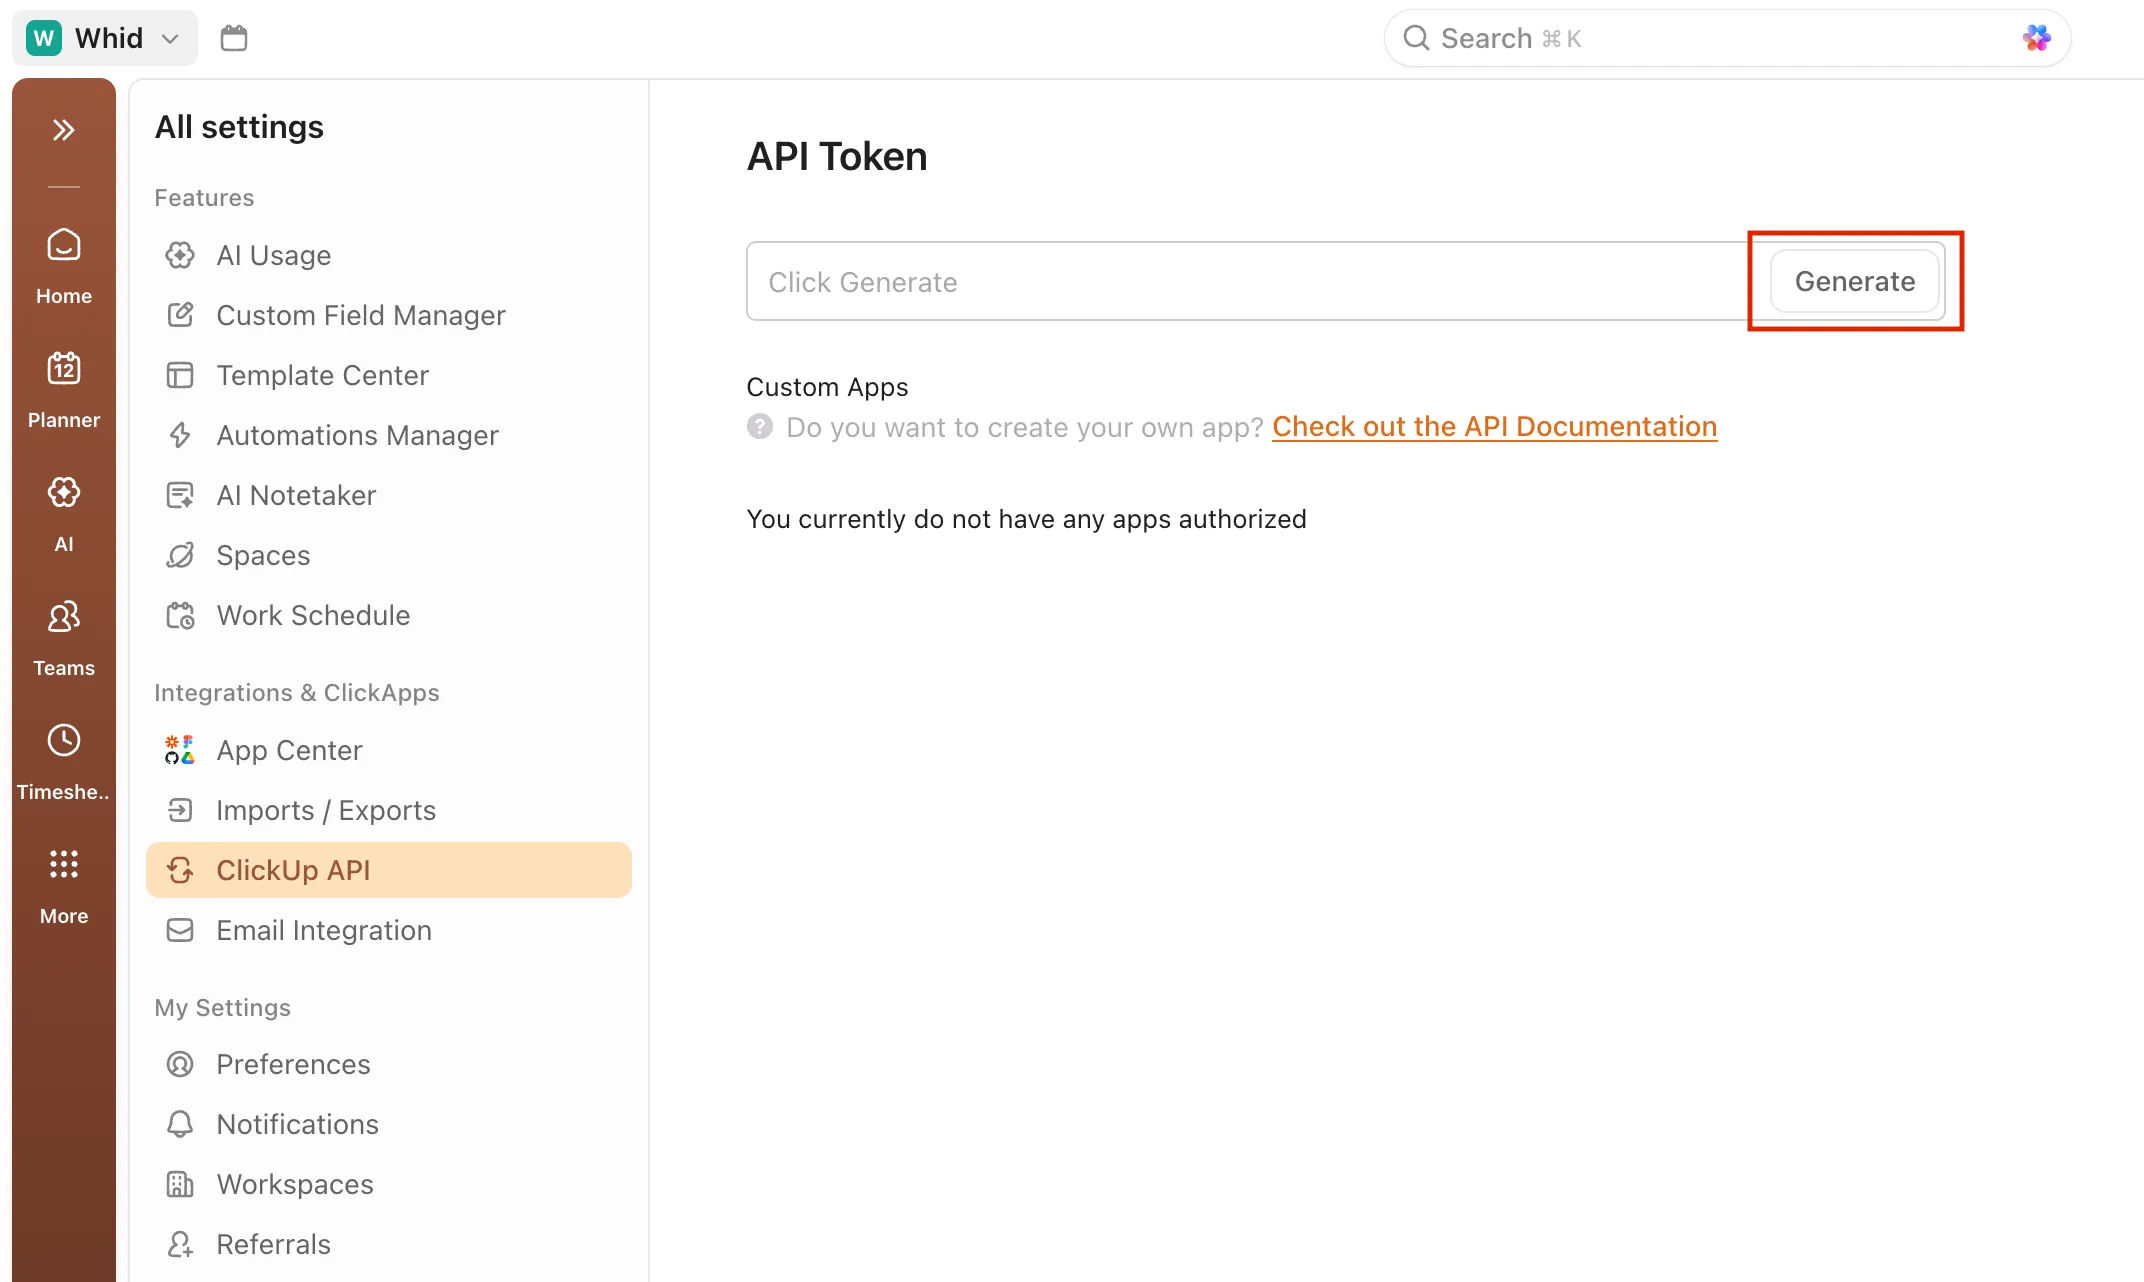
To fill the API token field, you have to create an API token in ClickUp. For this, open Settings > ClickUp API in your ClickUp, then generate an API token and copy it to Whid.
Note that ClickUp only provides one API token at a time, so if you already integrated it with another application, you must use the same API token for Whid.
The last thing to set is whether your tasks should be entered as billable. Enabling it sets all tasks for this profile to billable.
Now you can save your credentials.
Whid validates your credentials on Save. If you are not connected to the internet while saving, you can choose the “Save without validation” option, but Whid will always need access when you sync your tracked times to ClickUp.

Set up sync mappings
In ClickUp you can sync your booked times to tasks. To make your sync even easier, you can set up automatic mappings between your tracked tasks and ClickUp tasks.
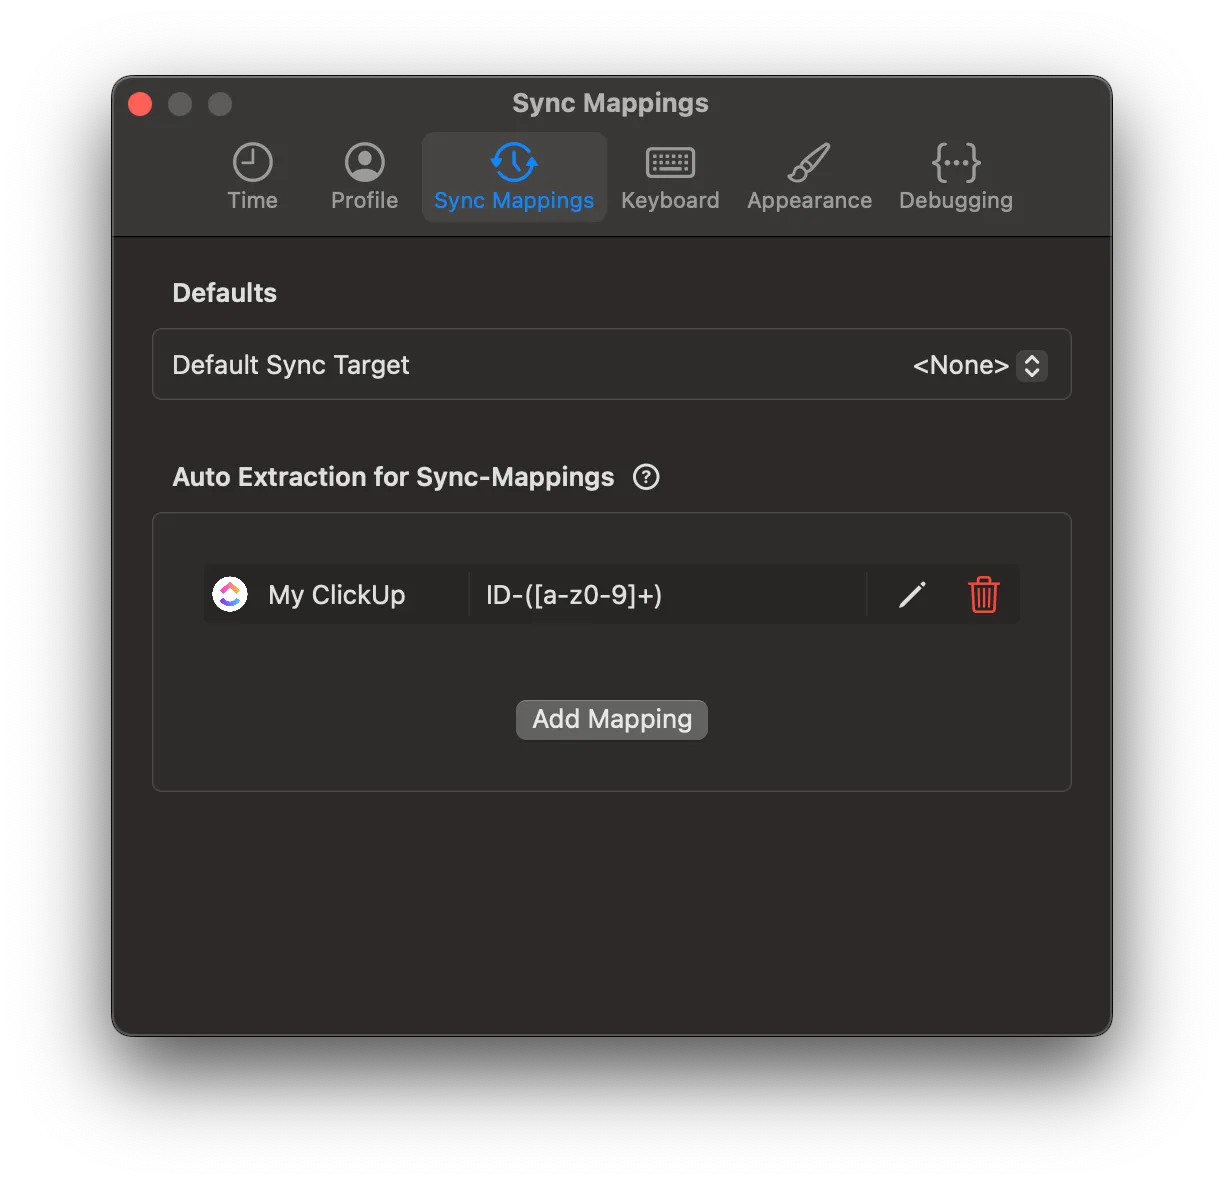
You can open the Settings > Sync Mappings tab in Whid.
Add a new entry in the “Auto Extraction for Sync Mappings” section: select your ClickUp profile from the dropdown. ClickUp IDs consist of numbers and alphabetic characters, so in order to avoid matching on regular task names, we recommend to use a prefix, like “ID-”. For example ID-([a-z0-9]+) will detect any IDs that have alphanumeric characters, and cuts the “ID-” prefix when mapping to ClickUp tasks.
Save the changes.
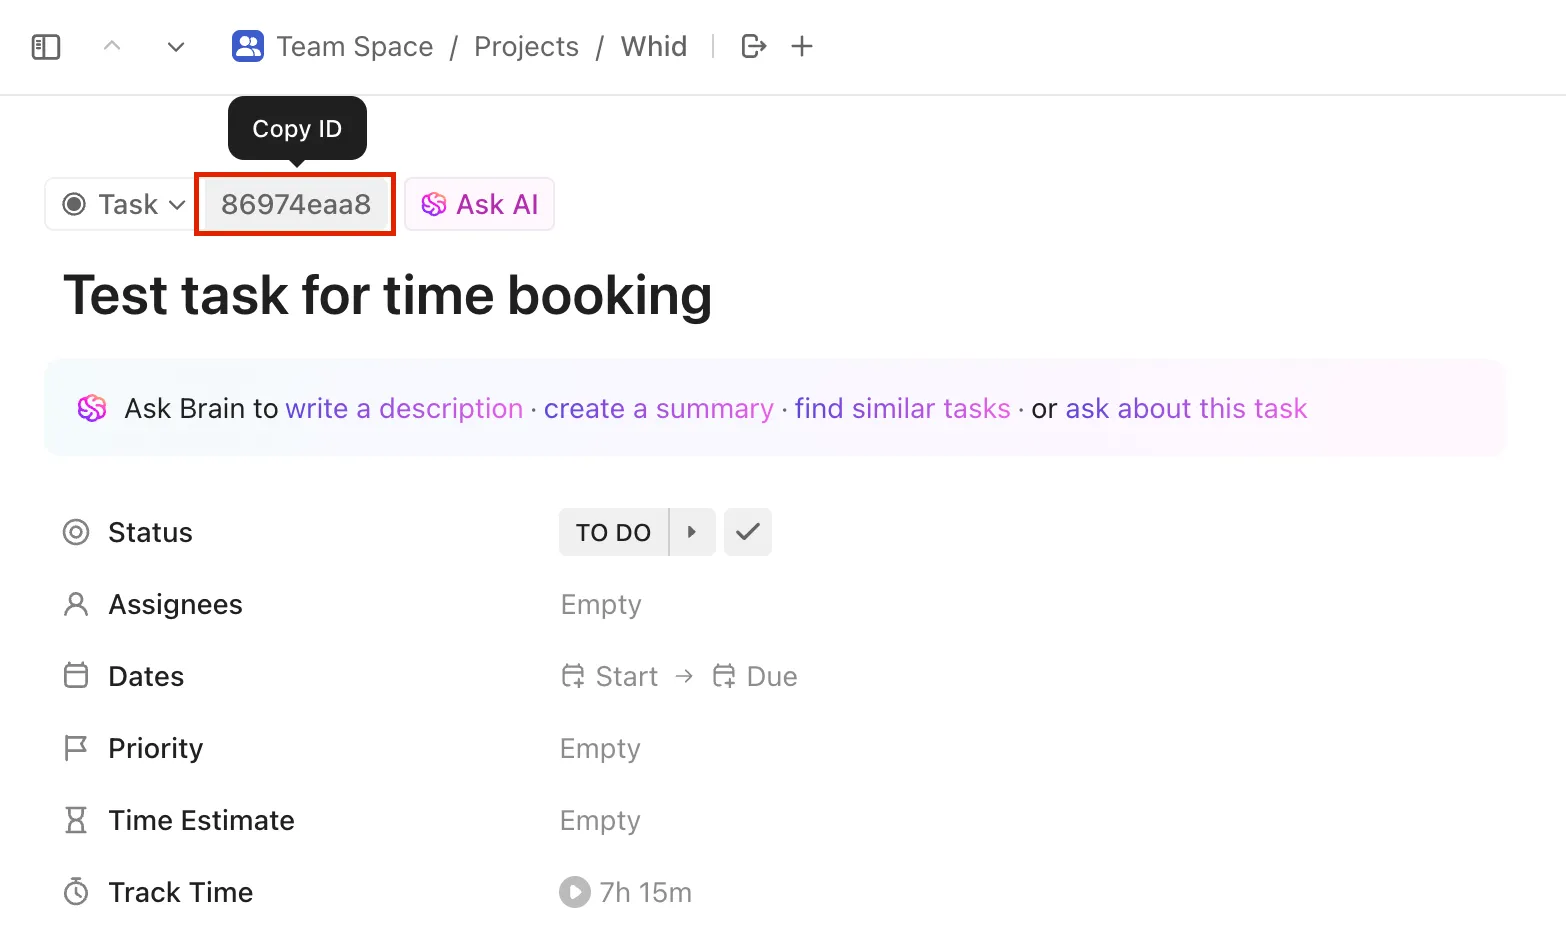
When creating a task in Whid, you can look up your task ID in ClickUp. For this, open a task in ClickUp and copy the ID from the top of the task page.
Benefit from sync mappings
To put the “Auto Extraction for Sync Mappings” to work, track your times with names that include their corresponding ClickUp task IDs.
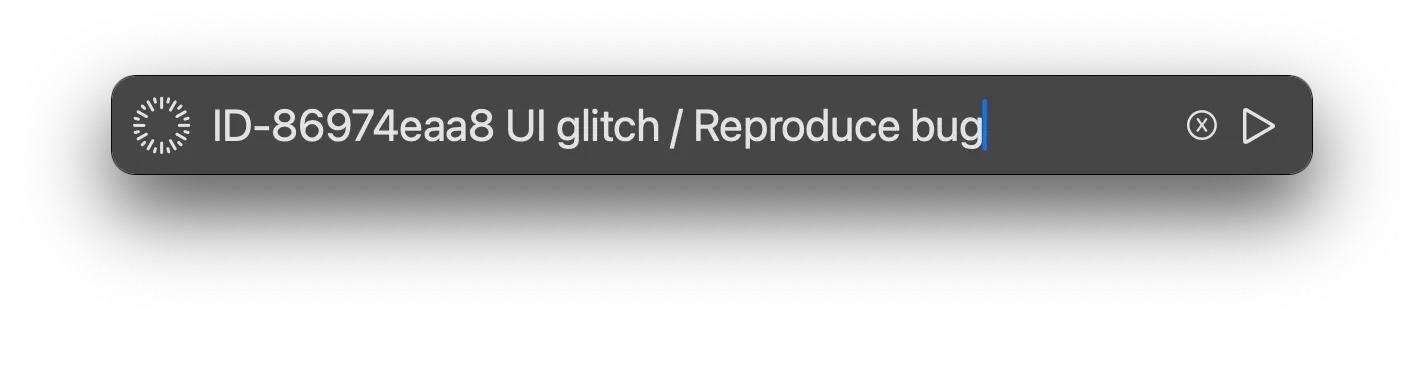
We recommend using the “task hierarchy” feature: you can create a task name that contains the ClickUp ID and a short description of the issue, while it also describes the actual lower-level task you are working on in the context of that issue.
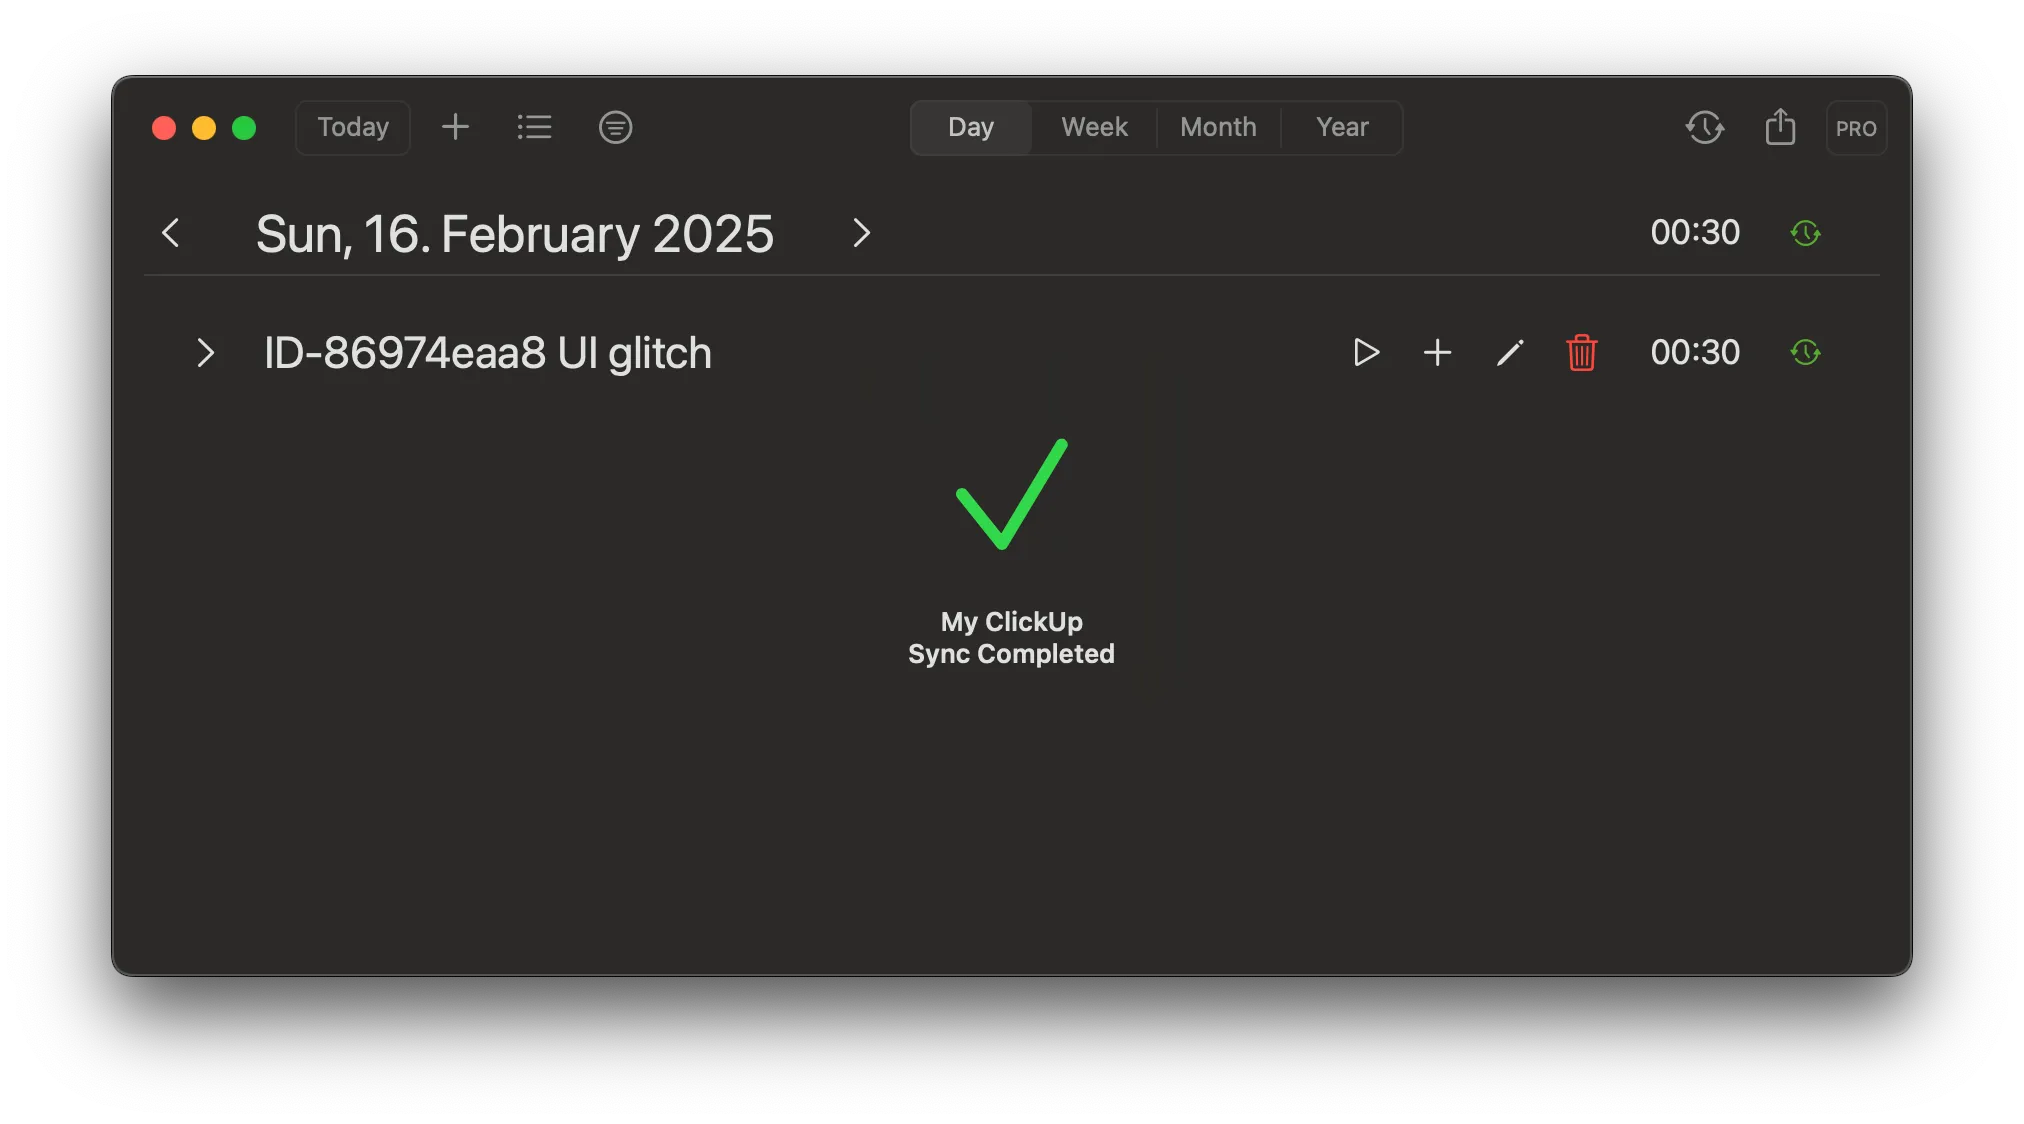
For example, if you are a developer and you work on a bugfix, one of your task names could look like this: ID-123abc456 UI glitch / Reproduce bug.
Sync to ClickUp PRO
Now you want to see all your tracked times in ClickUp? Then it’s time to sync them!
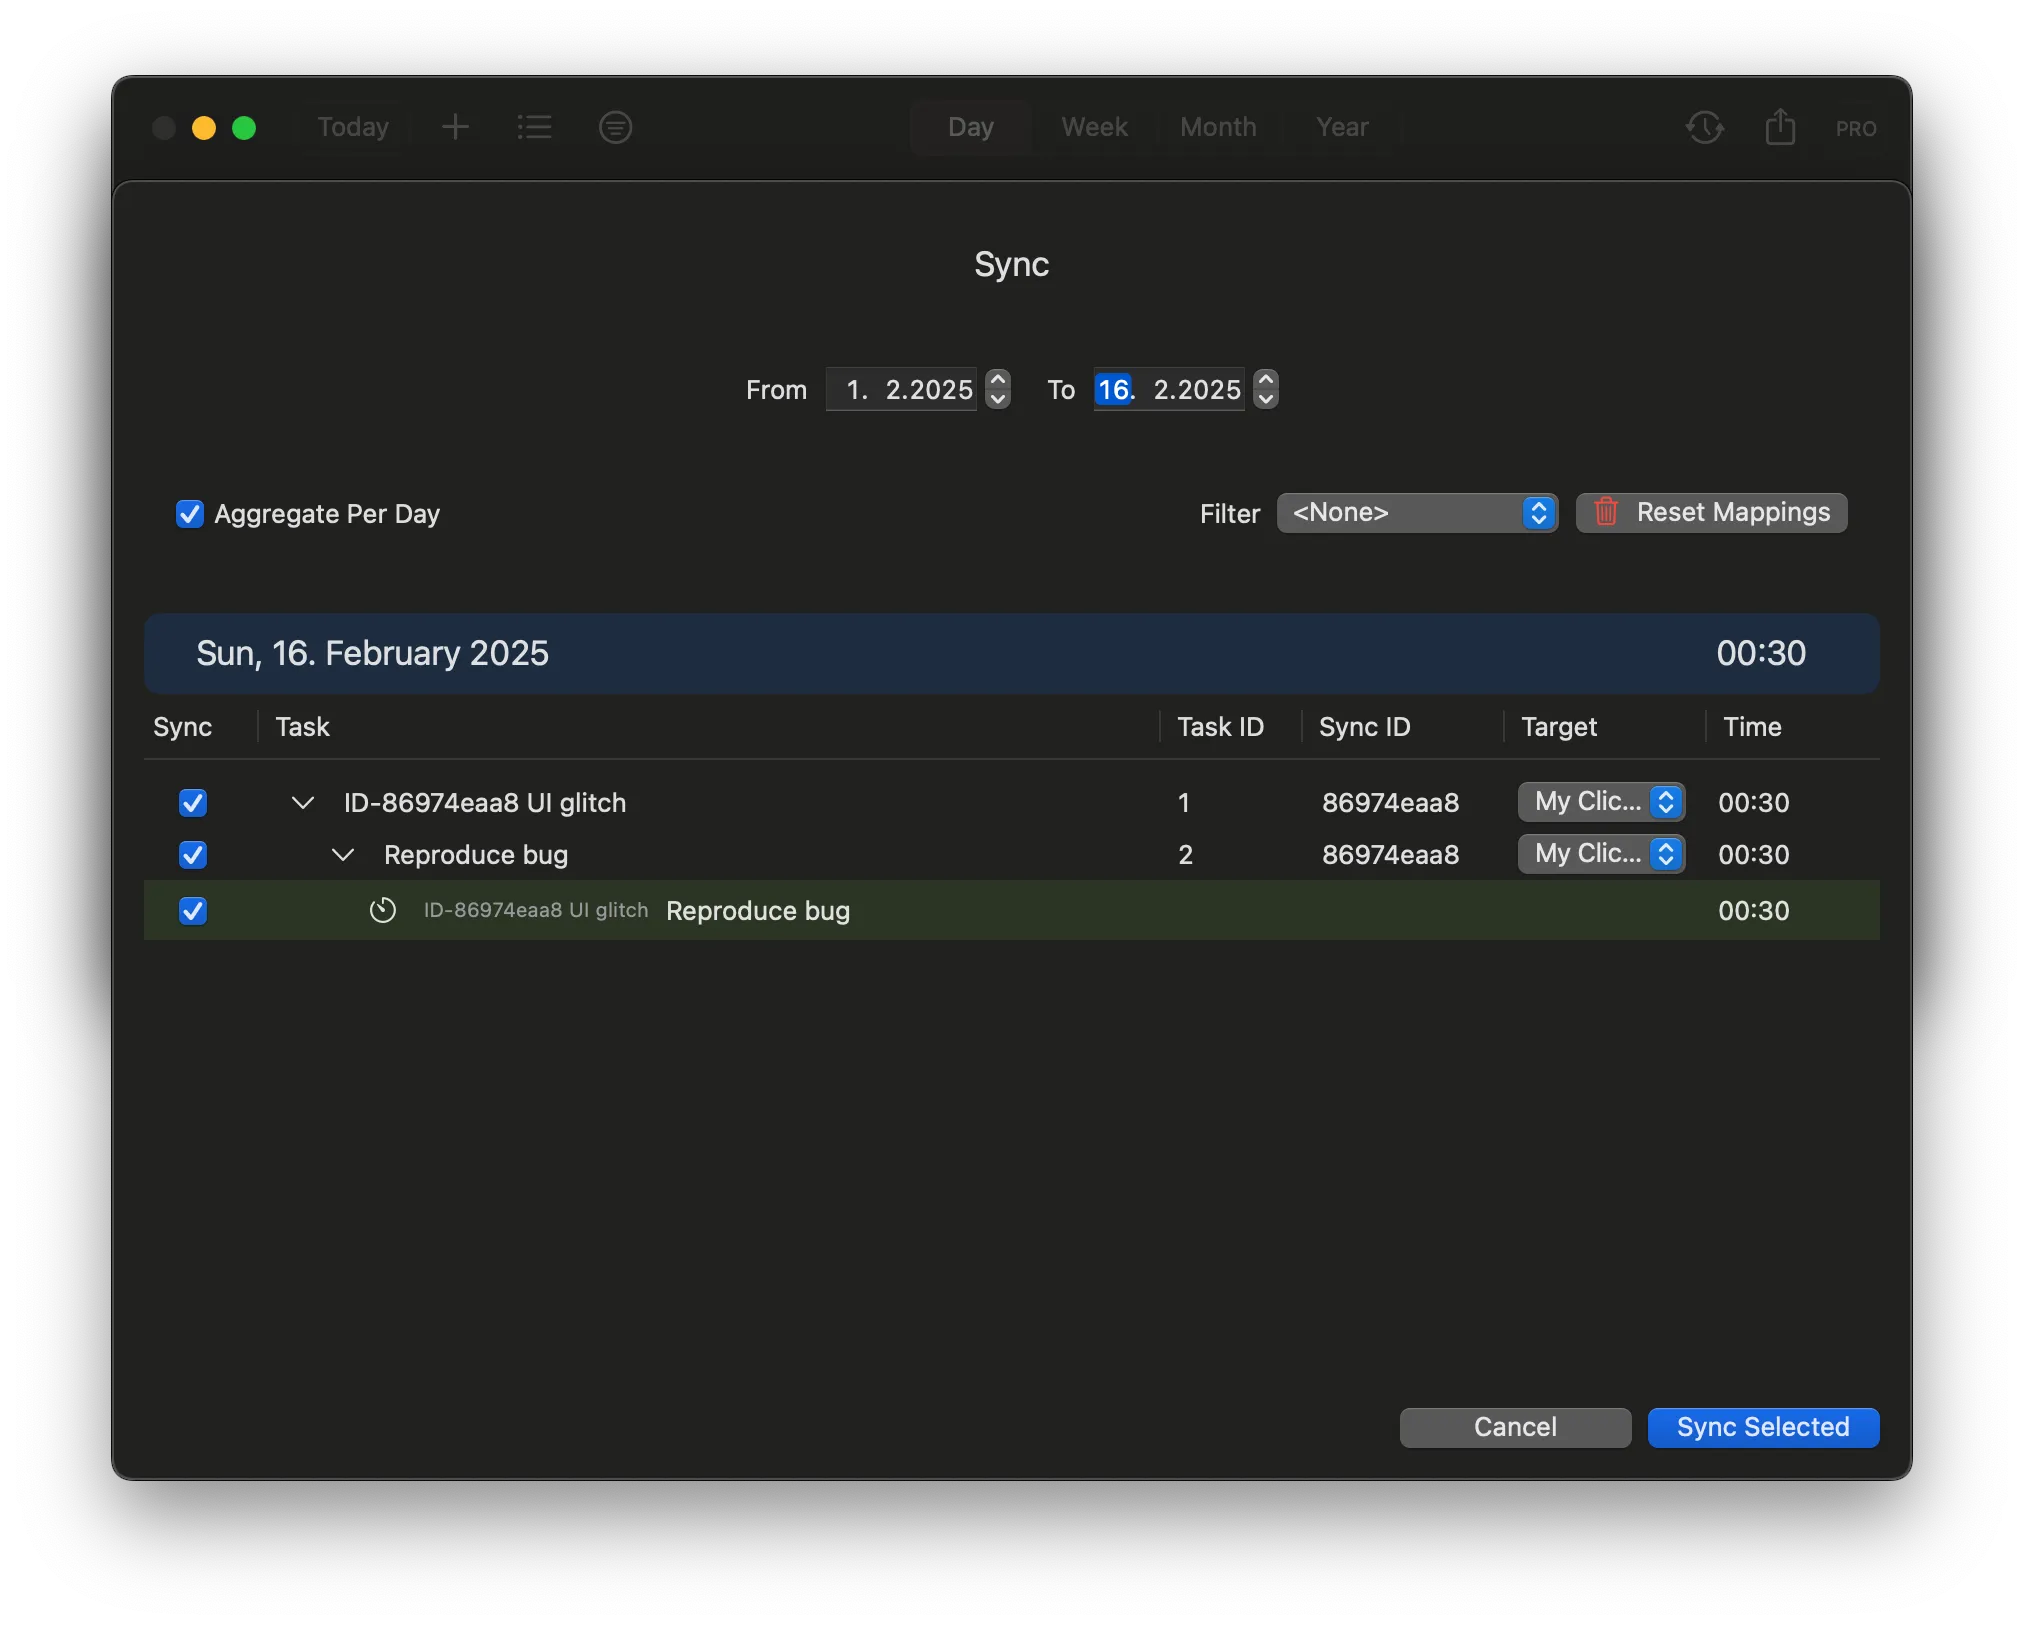
To open the sync overlay, first open the Main Window by right-clicking the tray icon and selecting “Main Window”. Then click the “Sync times” button in the upper right corner.
At the top, you can choose a time range for which you want to sync your entries.
If you use your ClickUp task IDs as described above, you might not have to adjust anything. But if something isn’t quite right, you can make adjustments as needed.
For each task you can enter a sync ID and select the profile which includes the system you want to sync to. You can also leave those fields empty for entries you don’t want to sync.
If Whid successfully detected ClickUp task IDs in your recorded entries, it will automatically fill the corresponding issue ID as sync ID, and set your ClickUp profile as Target.
After selecting which entries you would like to sync and filling the corresponding sync IDs, you can click on “Sync selected”.
Whid then reports the result for each synced entry: a green checkmark means the sync was successful, while a red X indicates that something went wrong.