Dammit, that’s typical… Turned into a frog by some Organizational Change Specialist Manager witch. I hate Tuesdays! And now I have to develop some stupid time tracking app for her, awesome. As a god darn Frog! Oh, well, better get to it and get this sh*t done.
Arthur will do the Windows part, so I guess I’m stuck with Swift. I’ll better get started.
TLDR; Issues with the setup
- Changing the Kotlin project from executable to framework
- Making the Kotlin framework available in Xcode
Setting up SwiftUI and Kotlin/Native projects
Ok, we want to set up a Time Tracking app with a shared Kotlin/Native Backend. We also want to be able to use that code from our Frontend which in this case is a Mac native application using SwiftUI - and AppKit where SwiftUI is not sufficient.
Setting up a SwiftUI Project in Xcode
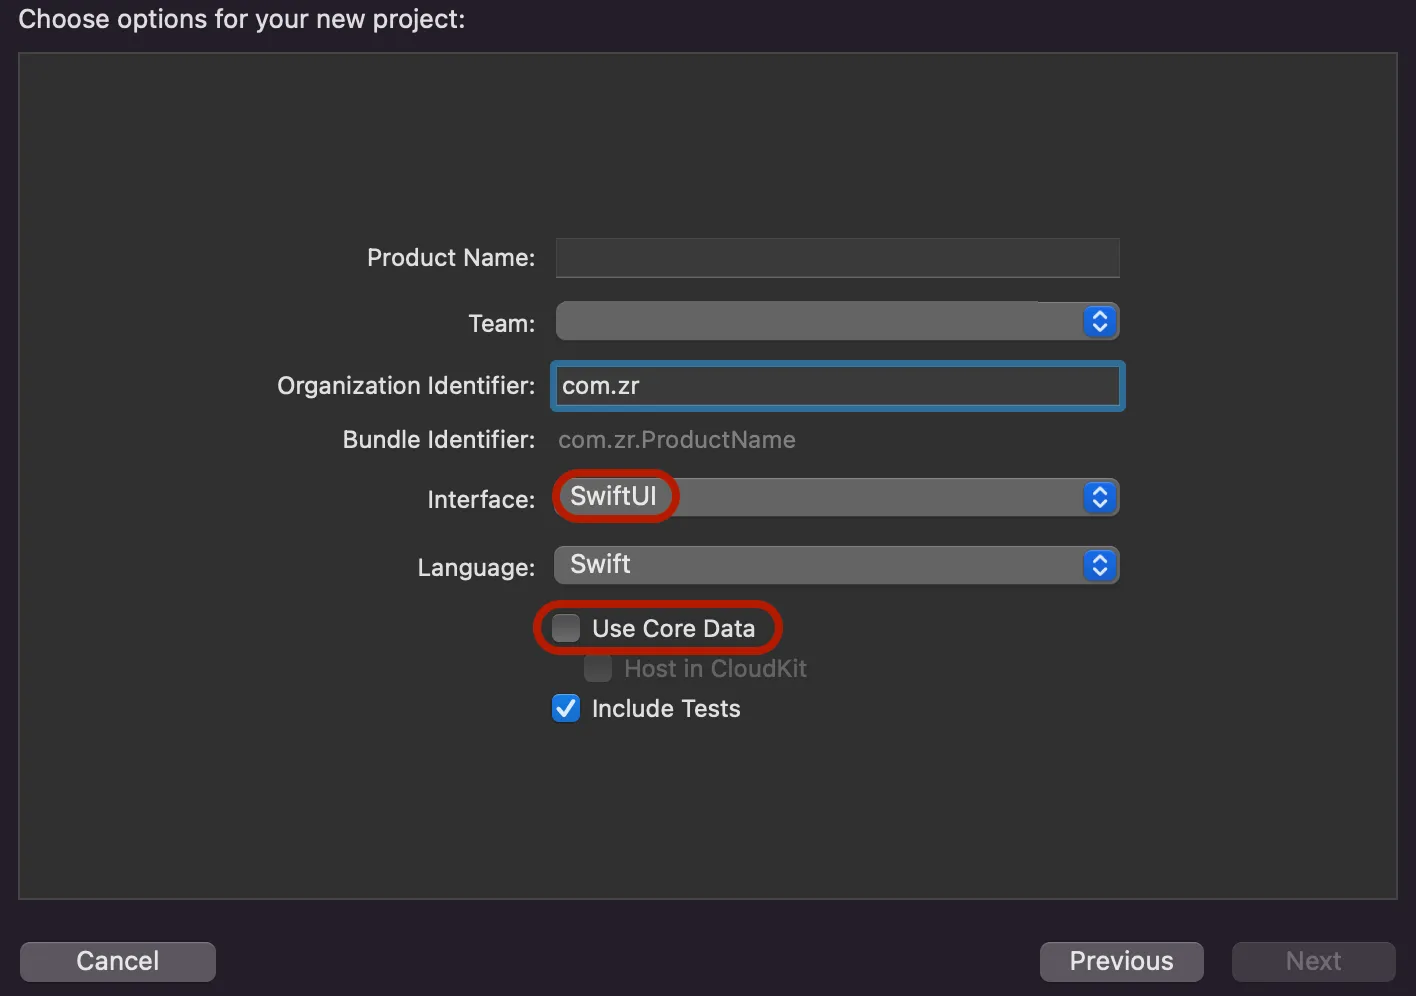
Let’s get started. First off, we set up a fresh Xcode project for MacOS:
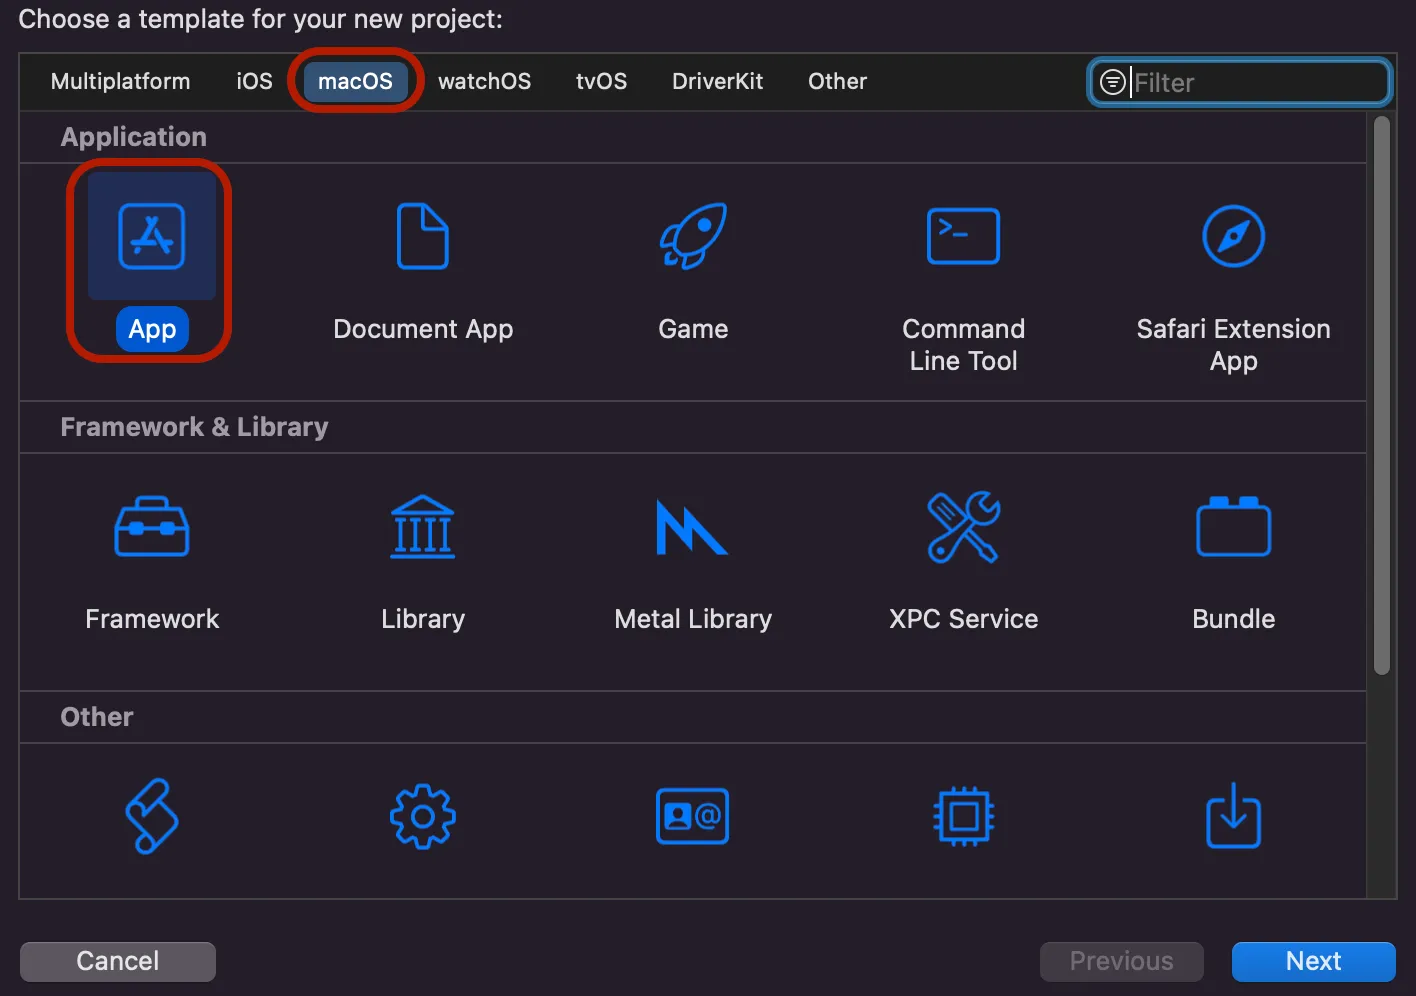
Important points are that we want to use Swift with SwiftUI and no Core Data, since persistent data storage will be handled by the Kotlin/Native Backend.
With these steps done, we have a project that when runs presents a little window with “Hello World!” in it (at the time of making).
We’ll get back to the Xcode project later, when we want to use Kotlin code, but for now, let’s set up the Backend.
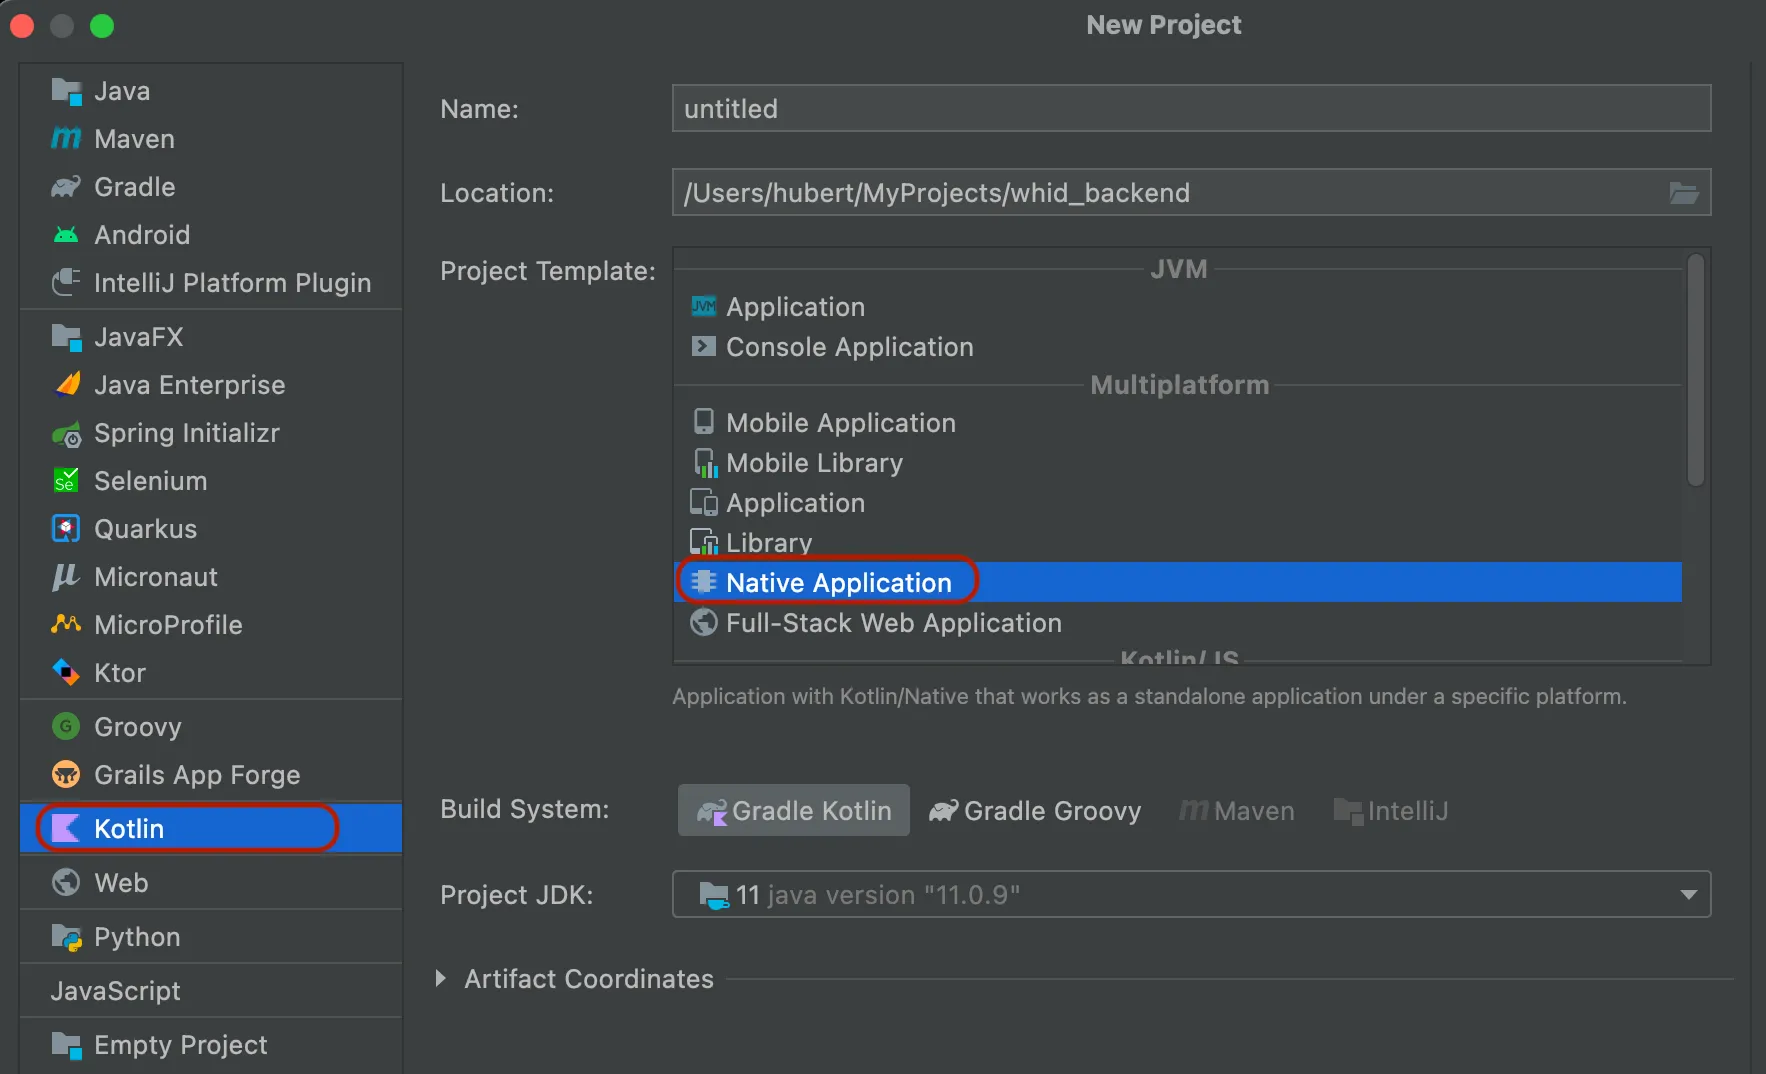
Setting up a Kotlin/Native Project in IntelliJ
To start off with the Backend, we set up a Kotlin/Native Project in IntelliJ. Important things here are that we use Kotlin and create a Native Application. For this project, we chose Gradle with Kotlin, but you can use Gradle with Groovy as well. Just note that the build code in the following sections would differ slightly.
Kotlin Native has a quite nice integration with Swift and it should get even better in the future. To utilize this, we have to change our compilation target from executable to framework. For Windows, a different configuration is needed. You can find more on that later when Arthur finally manages to set up the Windows part.
kotlin {
    val hostOs = System.getProperty("os.name")
    val isMingwX64 = hostOs.startsWith("Windows")
    val nativeTarget = when {
        hostOs == "Mac OS X" -> macosX64("native")
        hostOs == "Linux" -> linuxX64("native")
        isMingwX64 -> mingwX64("native")
        else -> throw GradleException("Host OS is not supported in Kotlin/Native.")
    }

    nativeTarget.apply {
        binaries {
            framework {
                baseName = "WitchesHideousIdea"
            }
        }
    }
    sourceSets {
        val nativeMain by getting
        val nativeTest by getting
    }
}
With this, we can compile the project and will get a .framework file in build/bin/native/debugFramework and build/bin/native/releaseFramework.
Combining Swift and Kotlin/Native
With the two project setups done, let’s get to the interesting part, communicating between Frontend and Backend.
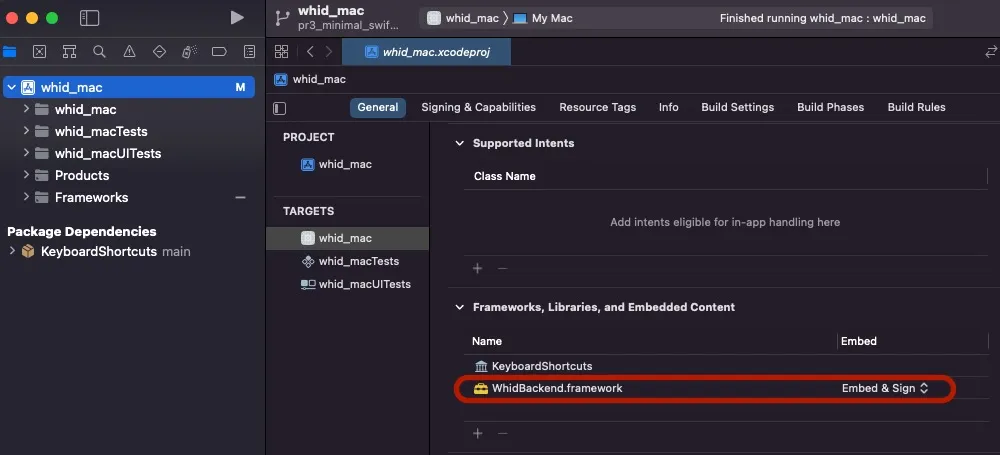
In theory, all we need to do is import the Framework we created in Kotlin/Native into our Xcode project. In practice, it turned out to be a bit more complicated. After several failed attempts of using exclusively Xcode internal features, here is what worked for me:
- Add the framework in the Kotlin output to your Xcode project. To do that, click on the plus icon under Frameworks, Libraries and Embedded Content. Then under Add Other… select the path to your Kotlin .framework file (it should be in
build/bin/native/releaseFramework).
- Create a copy step in the Kotlin project in which you copy the .framework file to the Frameworks group in the Xcode project folder. To achieve this, we use a
BuildListenerwhich looks as follows:
project.gradle.addBuildListener(object : BuildListener {
override fun settingsEvaluated(settings: Settings) {}
override fun projectsLoaded(gradle: Gradle) {}
override fun projectsEvaluated(gradle: Gradle) {}
override fun buildFinished(result: BuildResult) {
if (hostOs == "Mac OS X") {
copy {
from("build/bin/native/releaseFramework/WitchesHideousIdeaBackend.framework")
into("../whid_mac/Frameworks/WitchesHideousIdeaBackend.framework")
}
}
}
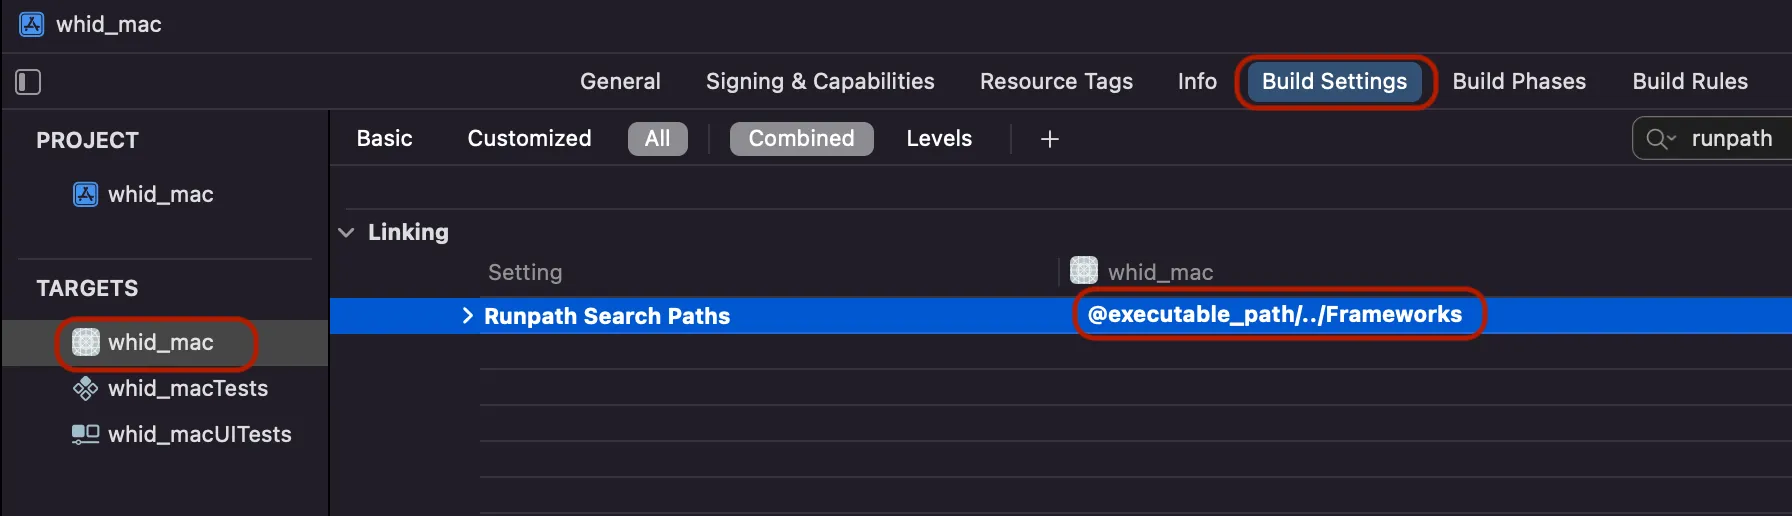
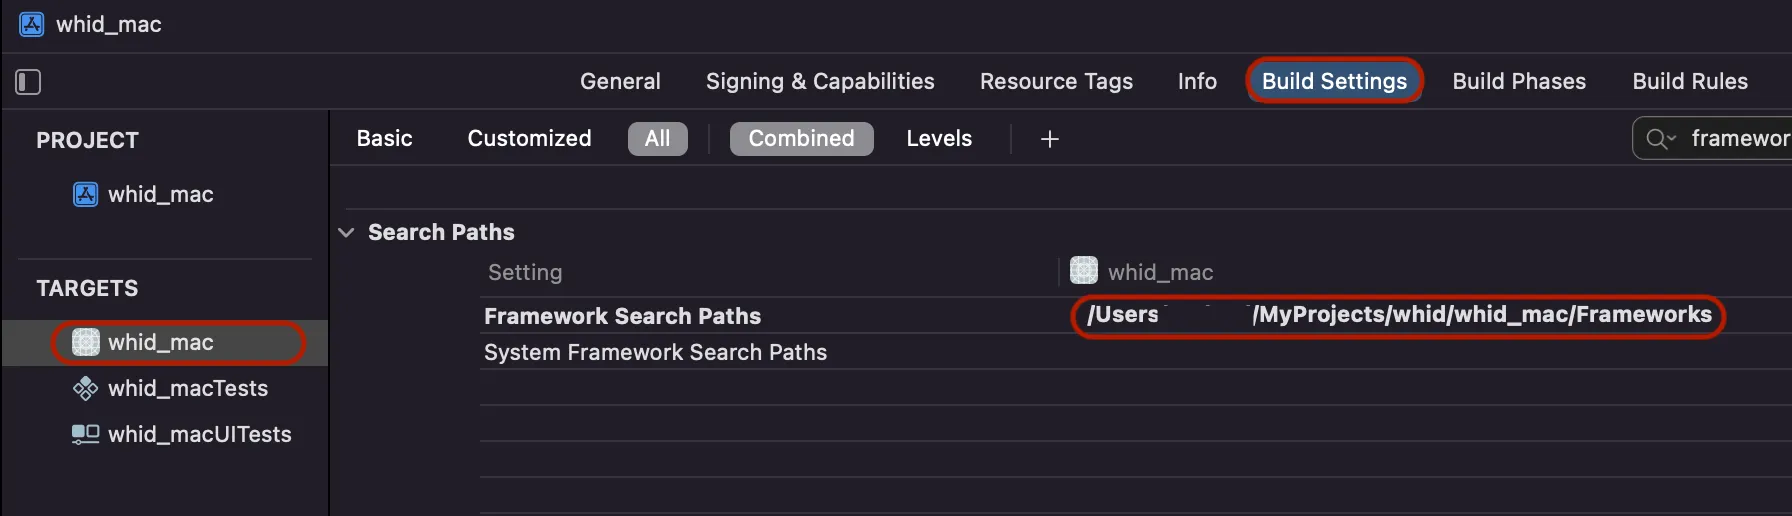
})- Edit your Framework Search Paths and Runpath Search Paths in Xcode project settings: For the Framework Search Path, we can add
$(PROJECT_DIR)/Frameworks(which is resolved to /users/… in the screenshot)
and for the Runpath Search Path add@executable_path/../Frameworks
With these steps done, the setup is complete. If you now build your Kotlin project, you should have access to it from your Swift project. To test this, we import the Framework in our default view and call a Kotlin/Native method on a button click.
import SwiftUI
import WitchesHideousIdeaBackend // Name of the Kotlin Framework

struct MainView: View {
    var body: some View {
        Button("Test") {
            test()
        }
        .padding()
    }

    func test() {
        // Call function in Kotlin/Native code
        BackendServiceKt.getTimeService().startTracking(task: "TestTask")
    }
}
To verify that this works, we can for example print the given task String in the Kotlin/Native method.
If this is running, we’re done! We have set up a shared Kotlin/Native backend that we can call from our Swift code.
Additional Notes
I’m fairly new to this topic myself. However, I want to share my experiences and the solutions I’ve found for the problems I’ve encountered.
If you have suggestions on how to do things in a better way, don’t hesitate to let me know in the comment section.